The garbage disposal is one of the hardest-working appliances in the kitchen, and one of the least appreciated until it starts causing problems. It handles food scraps multiple times a day, runs in short bursts, and sits in a permanently moist environment directly under the sink. Most people run water through it after each use and consider it cleaned. But the disposal accumulates organic residue, biofilm, and bacteria inside its grinding chamber and on its rubber splash guard in ways that water alone never addresses. Over time, this buildup is responsible for the persistent odor that many homeowners describe as coming from the sink area even when the drain itself appears clean.
Cleaning a garbage disposal properly requires understanding how the unit is constructed, where residue actually accumulates, and which cleaning methods work on each area of the appliance. There is a significant difference between the results of a casual rinse and a thorough cleaning that addresses every part of the unit. Getting that difference right keeps the disposal running effectively, eliminates the bacteria-rich buildup that causes odors, and extends the life of the appliance considerably. This guide covers all of it in the kind of detail that makes the information actually useful rather than general.
Understanding Where Residue Accumulates Inside a Disposal
Before cleaning a garbage disposal effectively, it helps to understand exactly where the buildup is happening. The disposal is not a simple drain opening. It is a multi-component unit with specific areas where food residue, biofilm, and bacteria concentrate, and each of these areas needs to be addressed directly to achieve a genuinely clean result.
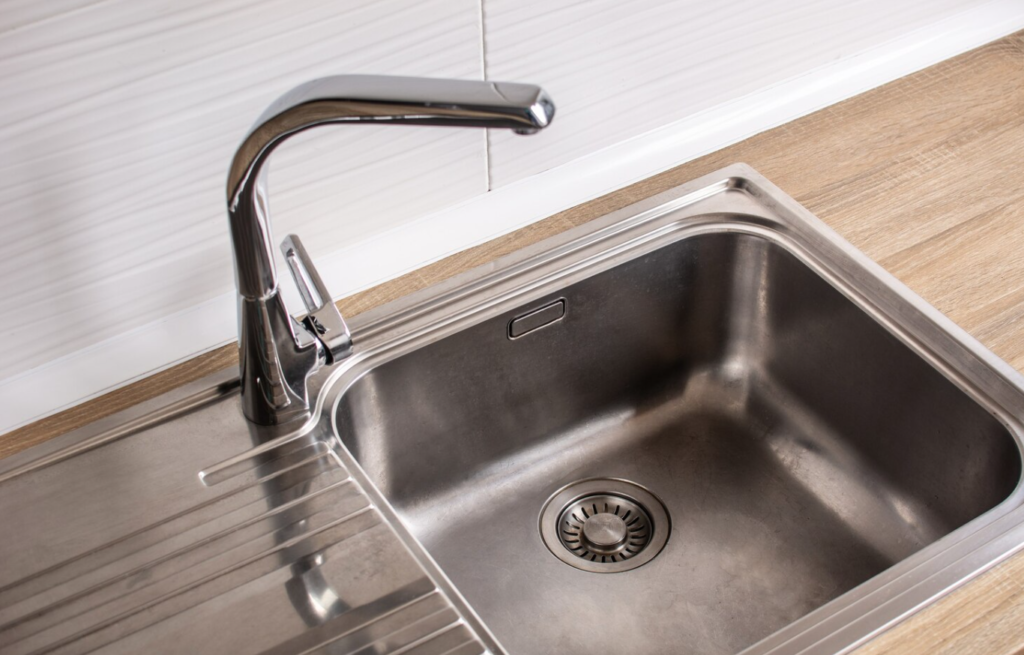
The rubber splash guard, also called the rubber flap or baffle, sits at the top of the disposal in the sink drain opening. It is the black rubber piece with flaps or a cross-cut design that prevents debris from flying out of the disposal during operation. Most people push dishes past it and run the disposal without ever thinking about what is happening on its underside. The underside of the splash guard is one of the most contaminated surfaces in the entire kitchen.
Food particles, grease, and bacteria accumulate on the rubber in a layer that builds over months or years in a home where the guard is never removed and cleaned. This surface is warm, moist, and constantly in contact with food residue, which makes it an ideal environment for bacteria and mold to flourish. The musty or sour smell that many homeowners associate with their disposal or sink area is frequently coming primarily from this component rather than from deep inside the drain.
The grinding chamber itself, which is the cylindrical interior of the disposal unit below the splash guard, accumulates food particles that stick to its walls rather than being flushed through during operation. Small pieces of food, grease, and starchy residue adhere to the interior surfaces of the chamber and begin decomposing in the warm, moist environment inside the unit. This decomposition produces the hydrogen sulfide and organic compounds responsible for the rotten or sour smell that worsens over time in a disposal that is used regularly but not cleaned.
The impeller plate, which is the rotating disc at the bottom of the grinding chamber, and the grinding ring around the perimeter of the chamber, both accumulate a layer of food residue and biofilm that thickens over time. This biofilm is a structured community of bacteria embedded in a self-produced matrix, and it adheres strongly to the surfaces it colonizes. Running water through the disposal flushes loose particles but does not disrupt established biofilm, which is why the smell from a disposal that has never been thoroughly cleaned returns within hours of being masked by soap or a citrus scent.
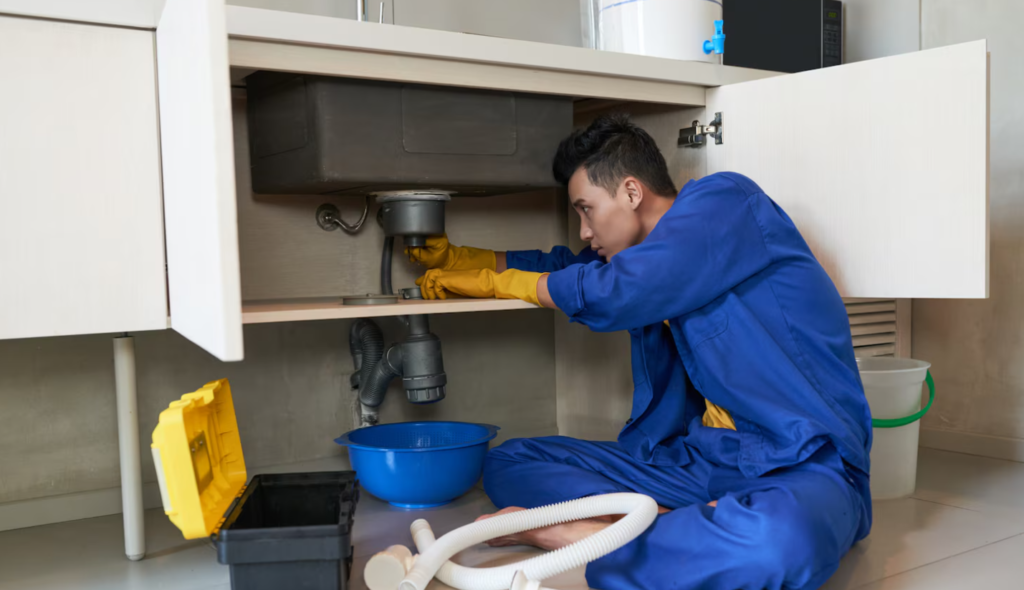
The drain opening below the unit, where the disposal connects to the drain pipe, accumulates grease and organic residue at the joint between the disposal outlet and the pipe. This area is not accessible during normal cleaning but benefits from periodic treatment with agents that break down organic buildup throughout the drain system connected to the disposal.
The Most Effective Methods for Cleaning a Garbage Disposal
Cleaning the disposal effectively requires addressing the splash guard, the grinding chamber, and the overall odor in a sequence that actually removes the source of the problem rather than temporarily masking it.
The splash guard should be the first component addressed because it is typically the primary source of odor and the most neglected part of the unit. Many splash guards are removable by simply gripping them firmly and pulling upward. Once removed, both the top and underside surfaces can be cleaned thoroughly using a stiff-bristled brush, hot water, and a small amount of dish soap. The underside requires scrubbing in the grooves and ridges where residue accumulates most heavily.
If the splash guard cannot be removed, it can still be cleaned in place by using an old toothbrush or a small bottle brush to access the underside by reaching through the drain opening from above with the unit powered off. Cleaning this component alone produces a noticeable reduction in disposal odor that surprises most people who have never addressed it before.
For the grinding chamber, ice is one of the most effective and non-toxic cleaning agents available for this specific application. Pouring approximately two cups of ice cubes into the disposal and running it with cold water for thirty to sixty seconds creates a mechanical scrubbing action inside the chamber as the ice chips against the impeller plate, grinding ring, and chamber walls.
The ice dislodges food residue and breaks up the biofilm layer on hard surfaces more effectively than liquid treatments alone. Adding a tablespoon of rock salt or coarse kosher salt to the ice increases the abrasive effect slightly without causing any damage to the unit’s components. After the ice and salt treatment, the loosened residue is flushed down through the drain with the continuing flow of cold water.
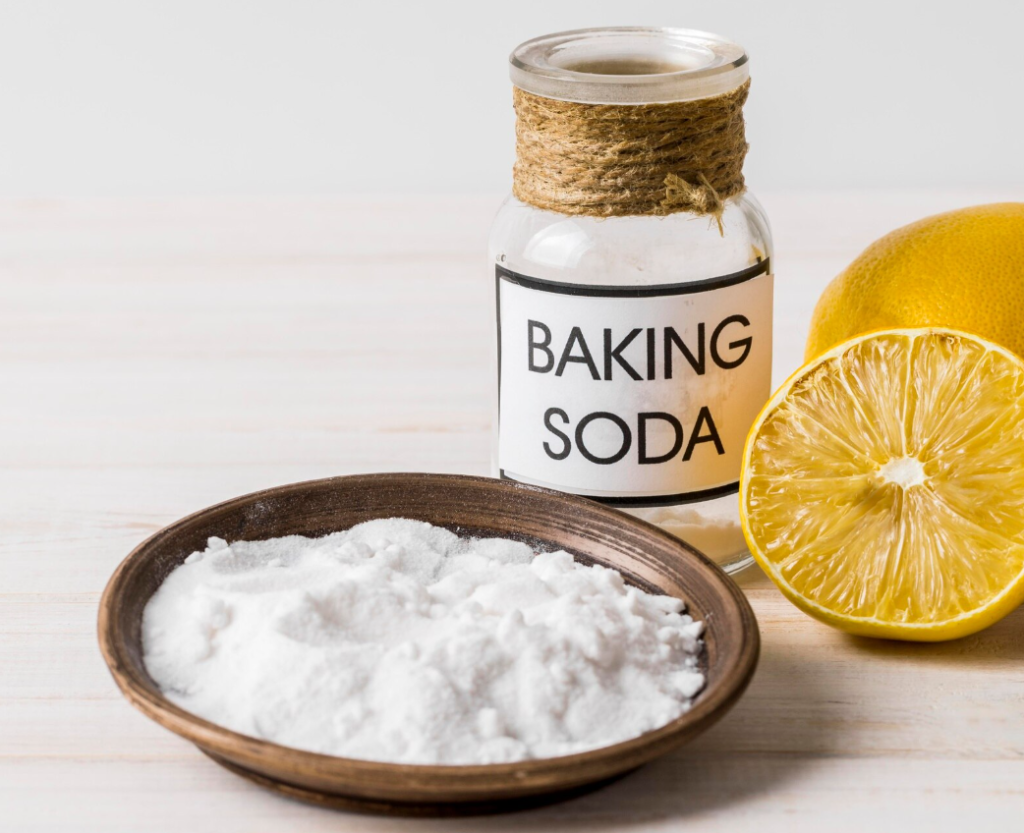
Baking soda and white vinegar together produce a cleaning reaction that is particularly useful for the disposal because it reaches areas that brushes cannot access directly. Pouring half a cup of baking soda into the disposal opening, followed immediately by half a cup of white vinegar, initiates a fizzing reaction inside the chamber that physically disrupts biofilm and organic buildup on the interior surfaces of the unit.
This reaction should be allowed to continue for five to ten minutes before the disposal is run with cold water to flush the loosened material through the drain. The combination of the mechanical fizzing action with the mild acidity of the vinegar and the alkalinity of the baking soda addresses the biological residue inside the chamber in a way that neither ingredient achieves as effectively on its own.
Citrus peels are a traditional and genuinely functional cleaning agent for garbage disposals, though their primary contribution is deodorizing rather than deep cleaning. Running lemon, lime, or orange peels through the disposal after a more thorough cleaning session releases citrus oils onto the chamber surfaces and the splash guard. These oils have mild antimicrobial properties and leave a fresh scent that masks the background odor of the unit between cleaning sessions. Citrus peels should be used after cleaning rather than instead of cleaning because the scent they produce does not address the underlying bacterial buildup that causes odors to return.
Dish soap used correctly is more effective at cleaning the disposal than most people realize, largely because of how it is typically used. Squirting dish soap down the drain and running water through it is a common habit that does almost nothing for the disposal because the soap moves through the unit too quickly to have meaningful contact with any surface.
A more effective approach is to plug the sink drain with the disposal off, fill the sink basin a few inches deep with hot water and several good squirts of dish soap, then release the plug and simultaneously turn on the disposal. The soapy water is pulled through the disposal all at once, creating much more contact time with the chamber walls and grinding components than a trickle of soapy water from a faucet does. This method produces noticeably better results for routine disposal maintenance.
How Often to Clean Your Disposal and What to Avoid
The frequency of disposal cleaning should match the intensity of use. For a household that uses the disposal daily for food scraps, a basic maintenance cleaning should happen weekly. This means the splash guard wipe-down and a flush with soapy water or the ice and salt treatment at minimum. A more thorough cleaning using the baking soda and vinegar combination, followed by citrus peels, should happen at least once a month.
For a household that uses the disposal less frequently, every two weeks for basic maintenance and monthly for a thorough cleaning is a reasonable schedule. The key sign that cleaning is overdue is the return of noticeable odor from the drain area, which indicates that bacterial buildup has reached the level where it is actively releasing compounds into the kitchen air.
There are several things that should never be put into a garbage disposal, and understanding them matters for both cleanliness and the functional health of the unit. Grease and cooking fat should not be put into the disposal because they solidify as they cool inside the drain pipe and create a buildup that accumulates food particles and contributes to both odor and clogs. Fibrous foods like celery, artichoke leaves, and corn husks should not go in because their fibers can wrap around the impeller and motor components and cause mechanical failures.
Starchy foods like pasta, rice, and potato peels expand when wet inside the drain and create thick pastes that clog the drain pipe. Coffee grounds should not go in because while they seem like a deodorizing option, they accumulate in the drain trap and contribute to blockages over time. Eggshells are frequently cited as beneficial for sharpening the disposal blades, but this is a persistent myth. Disposals do not have blades. They have impellers and grinding rings, and eggshell membrane material can wrap around impeller components and contribute to buildup.
Keeping the disposal clean is also directly connected to keeping the surrounding drain system clear. A disposal that is cleaned regularly contributes less organic material to the drain pipe beneath it, which reduces the rate at which the P-trap and drain pipe accumulate the residue that causes the broader sink odor problem that many homeowners mistake for a plumbing issue when it is actually a maintenance and cleaning issue.
Heavenly Maids Cleaning Services in Silicon Valley provides detailed residential cleaning and professional kitchen cleaning services throughout the Bay Area that include the kind of thorough attention to every kitchen component that most standard cleaning services do not cover.
For households in San Jose looking for home cleaning experts who understand the full scope of what kitchen cleaning actually requires, including the often-neglected appliances and fixtures that accumulate the most bacteria over time, Heavenly Maids Cleaning Services brings the knowledge and consistency that keeps a kitchen genuinely clean from every surface to every appliance. Recurring maid cleaning services that include proper kitchen attention keep these components maintained between the deeper cleaning sessions that restore them to a fully clean state, making daily kitchen use cleaner and more sanitary in every respect.
A clean garbage disposal is not a luxury detail of kitchen maintenance. It is a basic hygiene requirement for a kitchen that is used for food preparation every day. The methods described here are practical, non-toxic, and effective when applied consistently, and they require no special equipment or products beyond what most households already have. Building disposal cleaning into the regular rhythm of kitchen maintenance prevents the odor, bacteria, and mechanical issues that come from neglecting this one hardworking and frequently forgotten appliance.
Every home gets cleaned to some degree on a regular basis. Floors get swept and mopped. Countertops get wiped. Toilets get scrubbed. These are the tasks that make a home feel clean after each session, and they are the ones most people default to because they produce visible results quickly. But there is a whole category of cleaning tasks that rarely make it onto anyone’s list, not because they are unimportant but because they are either out of sight, rarely thought about, or simply never established as habits in the first place.
These forgotten tasks accumulate quietly over months and years, and the buildup they allow has real consequences for the condition of the home, the health of the people in it, and the longevity of the surfaces and materials involved.
This is not about making people feel bad for imperfect cleaning routines. It is about making the invisible visible, so that the areas most people miss can finally get the attention they need. Some of these forgotten tasks are quick and easy once you know to do them. Others require dedicated time or professional help. All of them matter more than most people realize until they see what has accumulated from years of being skipped.
The Forgotten Tasks Inside the Most-Used Rooms
The kitchen and bedroom are two of the most used rooms in any home, and both contain a surprising number of surfaces and items that get cleaned around rather than cleaned directly.
Inside kitchen cabinets is one of the most consistently overlooked cleaning areas in residential cleaning. The exterior of cabinet doors gets wiped regularly, but the interior shelves and walls of cabinets accumulate crumbs, spilled oils, dried residue from food packaging, and dust over months and years without ever being addressed. Most people go years without emptying their cabinets and cleaning the shelf surfaces inside. The longer this goes unaddressed, the more the residue hardens and the more it attracts insects and harbors bacteria. A thorough deep cleaning of cabinet interiors, done at least once or twice a year, removes this buildup and makes the space where food is stored genuinely clean rather than just visually tidy from the outside.
The range hood filter is another kitchen item that most homeowners acknowledge they have either never cleaned or cleaned only a handful of times. The range hood is designed to pull grease-laden air away from the cooking surface and pass it through a filter before exhausting it. Over time, that filter becomes saturated with grease to the point where it can no longer function effectively. A completely clogged range hood filter means the grease that should be captured is instead circulating through the kitchen air and settling on every surrounding surface.
The filter should be removed and cleaned in hot water with a strong degreasing dish soap every one to two months in a kitchen that sees regular cooking. Many people discover during this cleaning that the filter has not been addressed in years, by which point the grease has hardened significantly and requires extended soaking to remove.
The interior of the refrigerator door seals is a location that harbors significant bacterial and mold growth in most homes without anyone realizing it. The rubber gaskets that run around the perimeter of the refrigerator and freezer doors trap moisture, food residue, and crumbs in their ridges and folds. In a warm kitchen environment, this creates exactly the conditions mold and bacteria prefer.
Most people wipe the visible interior shelves of the refrigerator but never address the seals, which sit just at the edge of visibility and require deliberate attention to clean properly. Running a cloth or a soft brush into the ridges of the door seals monthly removes the accumulation and prevents mold from becoming established in a location that has direct contact with food containers every time the door is opened.
The tops of kitchen cabinets are one of the most dramatically neglected surfaces in any home. Positioned above eye level, they accumulate a thick layer of grease-laden dust that is different from the dust found elsewhere in the home because the cooking residue that rises to the ceiling level mixes with the dust and creates a dense, sticky coating. In a home where the kitchen is used daily and the cabinet tops are never cleaned, the accumulation over several years can be substantial. This buildup does not affect daily life visibly, but it is a significant reservoir of grime that professional house cleaning services address as part of a thorough kitchen deep clean.
In the bedroom, the top of the bed frame, headboard, and the area between the mattress and the headboard are surfaces that almost never get cleaned during routine house cleaning. Dust, hair, and small items accumulate in the gap between the mattress and headboard and on the flat surfaces of the frame, and the headboard itself, particularly if it is upholstered, collects dust and skin particles from the person sleeping against it.
The space under the bed, including the area closest to the wall which is hardest to reach, is another location that is often vacuumed around rather than under, and the dust that collects in this area circulates into the breathing zone of the room during sleep. Nightstands also accumulate rings from glasses, dust on their surfaces, and debris in their drawers that rarely gets addressed during a typical cleaning session.
The Overlooked Areas Throughout the Rest of the Home
Moving beyond the kitchen and bedroom, there are forgotten cleaning tasks distributed throughout every other room in a home that are worth understanding in specific terms.
Light switches and door handles are among the most touched surfaces in any home and among the least cleaned. Every person who moves through a home makes contact with door handles and light switches multiple times each day, making them one of the highest-bacteria surfaces per square inch in the entire house. Despite this, they are almost never included in a regular cleaning routine because they are not visually dirty in the way that a sink or a stovetop is. A monthly wipe with a damp microfiber cloth and a gentle sanitizing cleaner addresses this bacterial accumulation and is one of the fastest and most impactful hygiene improvements available in any home.
Baseboards throughout the entire home collect a consistent layer of dust and scuffs that most people associate with painting rather than cleaning. In reality, baseboards should be wiped down as part of a regular deep cleaning session because the dust that collects on their horizontal surface gets disturbed by foot traffic and recirculates into the room air. In homes where people suffer from seasonal allergies or respiratory sensitivities, dusty baseboards are a meaningful contributor to the indoor particle load. Wiping them with a damp microfiber cloth a few times a year removes the accumulated dust and keeps them looking well-maintained without requiring any special cleaning products.
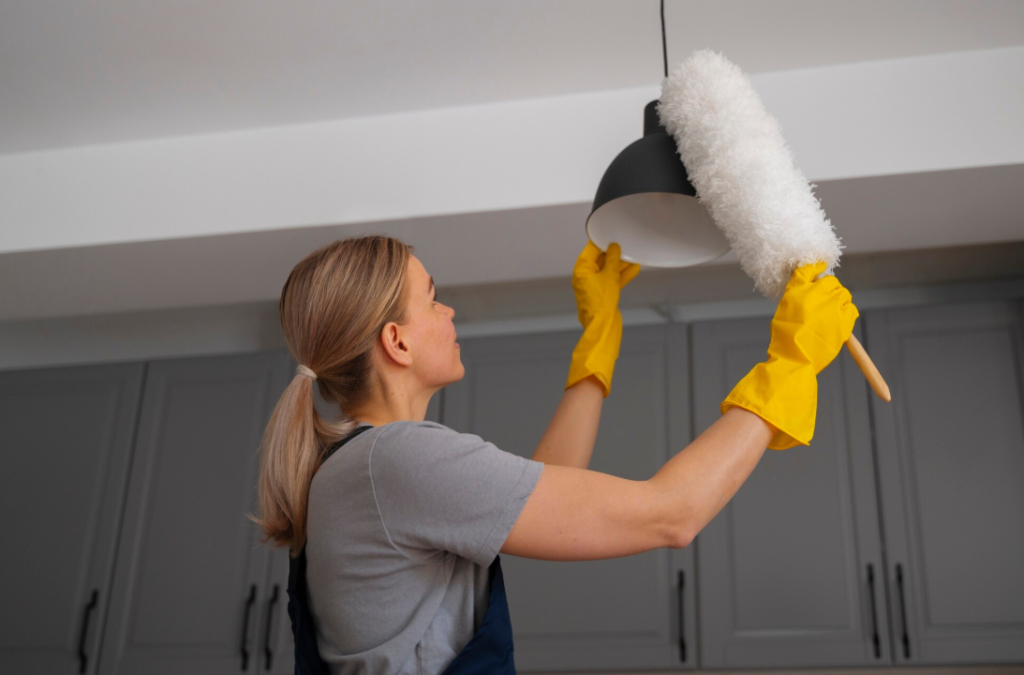
Ceiling fans are another surface that creates a disproportionate impact when forgotten. A ceiling fan that has not been cleaned for several months develops a visible layer of dust on the top edge of each blade. When the fan is turned on for the first time in a season, this accumulated dust is launched into the room air in a visible cloud that then settles on every surface in the space. Cleaning ceiling fan blades with a damp cloth before each seasonal transition prevents this redistribution and keeps the dust where it can be collected rather than recirculated. The motor housing and the light globe or shade on fans with lighting should also be addressed at the same time.
Window tracks and sills are consistently overlooked during window cleaning. Most people wipe the glass and consider the window clean, but the tracks that the window slides within accumulate a combination of dead insects, dust, debris, moisture residue, and in many cases mold in their grooves. These tracks are rarely visible from standing height and require deliberate attention to access properly. Cleaning them with a stiff brush and a damp cloth, or using a small vacuum attachment to remove the loose debris before wiping, completely changes the condition of the window area and removes a concentrated source of biological material that sits at breathing level in many rooms.
Drawer interiors throughout the home, in the kitchen, bathroom, bedroom, and office spaces, are rarely cleaned as distinct surfaces. Most people remove the contents when they are looking for something and replace them without ever wiping the drawer surface itself. Over time, crumbs, dust, hair, and residue from stored items accumulates on drawer surfaces and transfers to the items placed in them. Emptying and wiping the interior of drawers quarterly makes a significant difference in the overall hygiene of the home and is a task that takes only a few minutes per drawer.
Remote controls, keyboards, phones, and other handheld electronics are among the most bacteria-laden objects in any home and the ones that receive cleaning attention least frequently. Research consistently shows that handheld electronics carry more bacteria per square inch than toilet seats, largely because they are handled constantly and rarely sanitized. A monthly wipe with a slightly damp microfiber cloth, or a cloth with a small amount of isopropyl alcohol for surfaces that can tolerate it, dramatically reduces the bacterial load on these items. This is a particularly important habit in households with children or anyone with a compromised immune system.
The washing machine and dishwasher are two appliances that most people assume clean themselves through regular use. In reality, both accumulate significant residue and biological growth over time that affects their cleaning performance and contributes to odors. The washing machine drum develops a biofilm of detergent residue, fabric softener buildup, and mold, particularly in front-loading machines where the door seal retains moisture. Running a hot cleaning cycle with a washing machine cleaner monthly and leaving the door open after each load prevents this buildup from reaching the level where it produces noticeable odors and staining on laundry.
The dishwasher filter, which is the component at the bottom of the unit that catches food particles during washing, should be removed and rinsed weekly in a household that uses it daily. Most people are unaware that their dishwasher has a removable filter, let alone that it needs cleaning.
Heavenly Maids Cleaning Services in Silicon Valley provides deep cleaning services and recurring maid cleaning services throughout the Bay Area with specific attention to the tasks that regular cleaning consistently misses. For homeowners in Silicon Valley who want their homes cleaned at the level that addresses both the visible and the invisible accumulation, the detail-oriented approach of Heavenly Maids Cleaning Services covers the full scope of what a genuinely clean home requires, from the surfaces that get cleaned every week to the ones that have not been addressed in years.
Detailed home cleaning services for busy families who do not have time to address every forgotten corner of the home ensure that nothing continues to be overlooked simply because daily life gets in the way.
The tasks that get forgotten in cleaning are not the minor ones. Many of them, like range hood filters coated in years of grease, refrigerator door seals harboring mold, and light switches touched hundreds of times a day without ever being sanitized, are among the highest-impact cleaning jobs in the home. Building awareness of these overlooked areas is the first step toward a cleaning routine that actually addresses the full picture of what a home needs, rather than cycling through the same visible surfaces while the hidden ones accumulate unchecked.
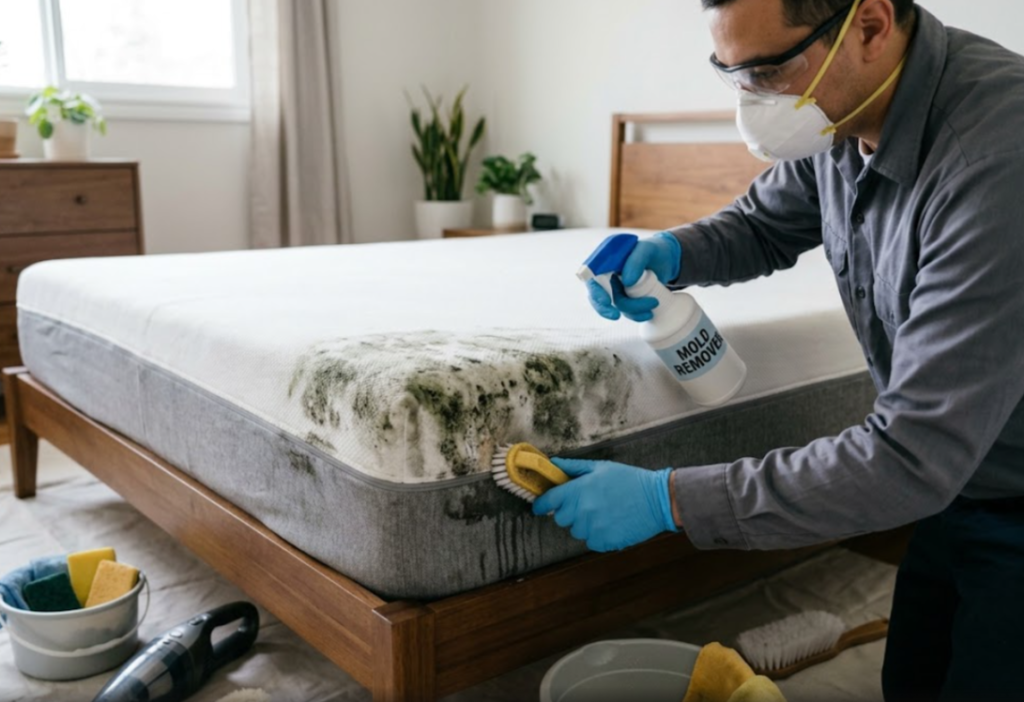
Finding mold on a mattress is one of those discoveries that stops people in their tracks. It is unsettling to realize that the surface where you have been sleeping, the place where your face rests for seven or eight hours every night, has been harboring a fungal growth. The reaction for most people is to strip the bed immediately and wonder whether the mattress can be saved or whether it needs to go straight to the curb.
The answer depends on how extensive the mold is, how deep it has penetrated, and whether the right removal steps are taken promptly and completely. In many cases, especially when caught early, mattress mold can be addressed effectively at home. In more serious cases, it requires a professional approach or replacement.
Understanding what causes mold to grow on a mattress, how to identify the extent of the problem, and which removal techniques actually work gives you the information needed to respond to this situation correctly rather than guessing or using methods that are ineffective or that make the problem worse. This is a topic worth knowing thoroughly because mattress mold is more common than most people realize, and the health consequences of sleeping on a moldy surface are real.
Why Mattresses Develop Mold and How to Recognize It
Mold needs three things to grow: moisture, organic material to feed on, and a temperature within the range that supports fungal life. A mattress provides all three in abundance. The human body releases significant moisture during sleep through perspiration and respiration. Even in a climate-controlled bedroom, a person sleeping on a mattress contributes roughly a liter of moisture to the sleep environment each night, and a large portion of that moisture is absorbed by the mattress surface and interior over time. If that moisture is not given the opportunity to evaporate and dissipate, it accumulates within the mattress material, creating a damp interior environment where mold spores, which are always present in indoor air, can germinate and grow.
Mattresses placed directly on the floor are far more susceptible to mold than those on a raised bed frame because the floor prevents air circulation under the mattress and creates a surface where moisture condenses. A mattress that sits on a floor collects the moisture from above from the sleeper and from below from condensation and floor-level humidity, making it a prime environment for mold development. Platform bed frames with solid tops rather than slatted bases can create a similar problem, particularly in rooms with higher humidity, because air cannot circulate beneath the mattress.
Memory foam mattresses are particularly vulnerable to mold because of their dense, non-breathable structure. Traditional innerspring mattresses have more internal airflow because the spring structure allows some movement of air through the interior. Memory foam has no such airflow, and moisture that enters the foam through the surface has nowhere to go except deeper into the material or to slowly evaporate from the top when given enough time and ventilation. In a bedroom with poor ventilation or consistently high humidity, this evaporation process is slow enough that moisture remains in the foam long enough for mold to establish itself.
Mold on a mattress does not always look dramatic in its early stages. The first signs are often a musty smell that is present when you pull back the bedding, even after the sheets have been freshly washed. This smell is produced by the volatile organic compounds that mold releases as a byproduct of its metabolic activity, and it tends to be noticeable before the visual signs of mold become obvious.
Visible mold typically appears as small clusters of dark spots, often black, green, or gray, on the mattress surface or around the edges and seams. In some cases the mold appears white or light pink, particularly in early growth stages or with certain mold species. The underside of the mattress is where the most extensive growth usually occurs because it receives the least light and air, so flipping the mattress during inspection is important for getting an accurate picture of the extent of the problem.
Mold that has progressed beyond surface spots to visible patches covering an area larger than roughly ten square inches, or mold that has clearly penetrated into the interior of the mattress, is generally beyond what home treatment can address effectively. At that stage, the mattress is likely releasing significant levels of spores into the room air during sleep and the health risk outweighs the cost of replacement. For surface-level mold caught relatively early, the removal process described below gives a genuine chance of restoring the mattress to a safe and usable condition.
Step-by-Step Techniques for Removing Mold From a Mattress
The first step before any cleaning begins is to take the mattress outside or into the most well-ventilated space available, ideally with direct sunlight exposure. Sunlight has a natural antifungal effect because ultraviolet radiation damages the DNA of mold cells and inhibits their ability to reproduce. Even an hour of direct sun exposure on the affected surface provides meaningful benefit and begins to dry the moisture that is supporting the mold growth. Working outside also prevents the disturbed mold spores from spreading through the indoor air of the bedroom during cleaning.
Before applying any cleaning agent, the surface should be vacuumed thoroughly using a vacuum with a HEPA filter. The purpose of this step is to remove as many surface mold spores as possible before the cleaning process begins. A HEPA filter is important here because standard vacuum filters allow fine particles including mold spores to pass through the exhaust air, which means vacuuming with a standard machine would simply redistribute the spores into the air around the mattress. After vacuuming, the vacuum bag or canister contents should be emptied immediately into a sealed plastic bag and disposed of outside.
Rubbing alcohol, specifically isopropyl alcohol at a seventy percent concentration, is one of the most effective and mattress-safe treatments for surface mold. It is antifungal, it evaporates quickly so it does not add significant moisture to the mattress, and it does not leave behind a residue that would attract new mold growth. It should be applied with a clean cloth, working in a gentle dabbing motion rather than scrubbing, which would push mold deeper into the mattress material and spread spores over a larger area. After application, the area should be allowed to dry completely in a ventilated environment before any further steps.
Hydrogen peroxide at a three percent concentration, which is the standard strength sold at pharmacies, is another highly effective option for mattress mold treatment. It has antifungal and antibacterial properties, it breaks down into water and oxygen after use leaving no harmful residue, and it has a mild bleaching effect that helps address the discoloration that mold leaves behind.
Hydrogen peroxide should be applied to the affected area using a spray bottle set to a fine mist, left to sit for ten to fifteen minutes to penetrate and react with the mold, and then blotted up with a clean dry cloth. It is important to avoid saturating the mattress with any liquid during this process. The goal is to treat the surface and a small amount of depth, not to soak the interior, because excess moisture is what caused the problem in the first place.
White vinegar is a third option that works well on mild surface mold and has the advantage of being completely non-toxic, which matters for a surface you sleep on. Full-strength undiluted white vinegar applied to the area and left for an hour before blotting clean kills a significant percentage of common mold species through its acidic chemistry. The smell of vinegar dissipates as the mattress dries and does not remain on the surface after complete drying.
After any of these treatments, the mattress needs to dry fully and completely before it is returned to use. This is not optional and it is not something that can be rushed. A mattress that is reassembled with bedding while still retaining any moisture from the treatment process will develop new mold growth in a matter of days because the conditions for mold have been restored. The mattress should be left in direct sunlight and open air for several hours if possible. If outdoor drying is not practical, the mattress should be positioned near an open window with a fan directing air across the treated surface for a full day before use.
Preventing Mattress Mold From Returning After Treatment
Successfully removing mold from a mattress is only half the solution. Without addressing the underlying conditions that allowed it to develop in the first place, the same problem will return within weeks or months. Prevention requires specific and consistent changes to how the mattress is used and maintained.
A mattress protector is the single most effective preventive tool available for any mattress. A waterproof but breathable mattress protector creates a physical barrier between the sleeper and the mattress surface, blocking the body moisture that would otherwise penetrate into the mattress material during sleep. The protector should be washed regularly in hot water, at a minimum every two to four weeks, to remove the accumulated moisture, skin cells, and organic material from its surface. A clean protector on a clean mattress creates a sleeping environment that is genuinely inhospitable to mold growth under normal conditions.
The mattress should be placed on a bed frame with slats rather than a solid platform, allowing air to circulate beneath the mattress and assist with moisture evaporation. The spacing between slats matters as well. Slats placed more than about three inches apart may allow the mattress to sag and reduce the overall airflow benefit. Many mattress manufacturers publish recommendations for the minimum slat spacing appropriate for their products, and following these recommendations protects both the structural integrity of the mattress and its resistance to moisture-related problems.
Rotating the mattress head-to-foot every three to six months distributes the areas of heaviest use and moisture exposure more evenly across the mattress surface. This prevents any single area from accumulating moisture at a much higher rate than the rest of the mattress, which is how localized mold patches develop even in mattresses that are otherwise well-maintained.
Room humidity plays a direct role in mattress mold risk. Bedrooms with consistent humidity levels above fifty percent provide a more favorable environment for growth throughout the room, including on and in the mattress. Running a dehumidifier in a high-humidity bedroom, particularly during warm and humid months, keeps the overall moisture level of the room at a level that discourages mold growth on all soft furnishings including the mattress. Opening bedroom windows on dry days and running ceiling fans to improve air circulation also reduces the ambient humidity that supports mold development.
Allowing the mattress to air out for a period each morning before making the bed is a simple and effective daily habit that most people do not practice. Pulling back the covers and leaving the mattress exposed to room air for fifteen to thirty minutes each morning allows the surface moisture from the night to evaporate rather than being trapped under bedding. In a well-ventilated bedroom, this habit alone makes a measurable difference in the moisture level of the upper layers of the mattress over time.
Heavenly Maids Cleaning Services in San Jose provides professional residential deep cleaning services throughout the Bay Area with the attention to bedroom environments and soft furnishing care that helps homeowners maintain genuinely healthy sleeping conditions. For households dealing with mold-related concerns in the bedroom or other living spaces, professional deep cleaning services that address the broader room environment, including the surfaces, furnishings, and conditions that contribute to moisture and mold, support the work that individual mattress treatment and prevention habits accomplish. A clean, dry, well-maintained bedroom is the foundation of healthy sleep, and it starts with understanding the conditions that allow problems like mattress mold to develop in the first place.
Keeping a home clean is something most people try to do. The challenge is that trying and succeeding consistently are two different things. Life gets busy, schedules shift, and the cleaning that was supposed to happen on Saturday morning gets pushed to Sunday, then to the following week, and before long the home has slipped from the standard that felt manageable just a few weeks before. This is not a failure of effort.
It is usually a failure of system. When cleaning depends on finding the time and motivation to do a large amount of work all at once, it will always be vulnerable to being postponed. When it is built into the rhythm of daily life in smaller, deliberate habits, it happens consistently without feeling like a project.
The healthiest approach to keeping a home clean is not the same as the most thorough approach applied irregularly. A home that gets a major clean once a month and is largely ignored in between will spend most of its time in a state that affects the people living in it, through accumulated dust, bacteria on kitchen and bathroom surfaces, and air quality that declines between sessions.
A home maintained through consistent daily habits combined with periodic deeper cleaning stays at a much higher baseline and genuinely supports the health of everyone inside it. Understanding what that system looks like in practice, which habits matter most, which rooms need the most attention, and when professional support adds real value is the foundation of a cleaning approach that actually works over time.
Building Daily Habits That Prevent Buildup
The most effective strategy for consistent cleanliness is prevention. Preventing dirt and bacteria from building up in the first place is always less work than removing them after they have accumulated. This seems obvious, but most cleaning approaches are reactive rather than preventive, which means the same problems have to be addressed over and over instead of being stopped before they develop.
The kitchen is where daily preventive habits have the greatest impact on household health. Wiping down countertops and the stovetop after every use, rather than leaving residue until a cleaning day, prevents grease and food particles from hardening and becoming increasingly difficult to remove. Bacteria multiply rapidly on kitchen surfaces at room temperature, and a counter that was used for food preparation in the morning and left uncleaned until evening has had hours for bacterial populations to grow. A quick two-minute wipe with a damp microfiber cloth and a fragrance-free, plant-based cleaner after each use keeps the kitchen at a sanitary level throughout the day without requiring any substantial dedicated cleaning time.
Dishes should be washed or loaded into the dishwasher within a reasonable time after use. Left in the sink, food residue on dishes creates odors, attracts pests, and produces the kind of bacterial environment that spreads to the surrounding sink and counter surfaces. This is not about perfectionism. It is about recognizing that the kitchen sink is one of the highest-bacteria surfaces in any home and that food residue left sitting is one of the primary reasons it stays that way. Rinsing dishes immediately and managing them within the same day prevents the pile from becoming a hygiene problem rather than just a visual one.
Bathroom habits follow a similar logic. Wiping the sink and faucet after morning use takes under a minute and prevents the buildup of toothpaste residue, soap scum, and water spots that compound over days into something that requires actual scrubbing. Running the exhaust fan during every shower and for at least fifteen to twenty minutes afterward removes the humidity that drives mold growth in grout, caulking, and on wall surfaces. A shower that is properly ventilated after use dries faster, develops mold more slowly, and stays cleaner between dedicated cleaning sessions. A squeegee run over the shower walls after each use reduces water spots and soap residue dramatically and takes approximately thirty seconds.
Floors respond well to a daily one-minute sweep or Swiffer pass in high-traffic areas like the kitchen and entryway. These are the areas where outdoor particles, food debris, and pet hair collect fastest and where the accumulation most directly affects indoor hygiene. A quick daily sweep in these specific areas prevents the buildup that would otherwise require a longer, more effortful cleaning session at the end of the week. This approach is far more effective than ignoring floors all week and trying to address the accumulated debris on a cleaning day.
The habit of putting things back where they belong immediately, rather than setting them down to deal with later, has a cleaning benefit that goes beyond organization. Clutter on surfaces prevents those surfaces from being cleaned effectively. When counters, tables, and floors are kept clear through daily tidying, wiping and cleaning those surfaces becomes a matter of seconds rather than minutes. The visual and psychological benefits of a tidy environment, which have been well-documented in research on stress and productivity, are an additional return on a habit that already pays off in cleaning efficiency.
How to Approach Weekly Cleaning for Maximum Health Benefit
Daily habits manage the baseline, but certain cleaning tasks need to happen weekly to prevent the accumulation that daily habits cannot fully address. The key to a weekly cleaning routine that actually gets done is keeping it specific, time-limited, and organized so that the same tasks happen in the same order every time without requiring decision-making or motivation to get started.
Bathrooms need a weekly clean that goes beyond the daily wipe. This means scrubbing the toilet inside and out including the base and the back, cleaning the shower or tub walls and floor, mopping the bathroom floor including the corners and behind the toilet, and addressing the mirror and all fixture surfaces. The toilet interior is one of the highest-bacteria surfaces in the home and needs weekly attention with an appropriate sanitizing product. The shower floor accumulates soap scum, dead skin cells, and early mold growth rapidly in a warm, humid environment and benefits from a weekly scrub before any of these have had time to become established.
Bedroom floors and surfaces need weekly attention because bedrooms are where the highest density of dust mite activity occurs. Dust mites live in mattresses, pillows, and bedding and shed allergen-containing particles continuously. Vacuuming the bedroom floor weekly with a HEPA filter vacuum, wiping down all surfaces including nightstands and the tops of dressers, and washing bedding in hot water at least every one to two weeks reduces the allergen load in the room where you spend the most consecutive hours breathing the same air. Rotating and flipping the mattress every three months distributes wear and disrupts the dust mite populations that concentrate in the most-used areas.
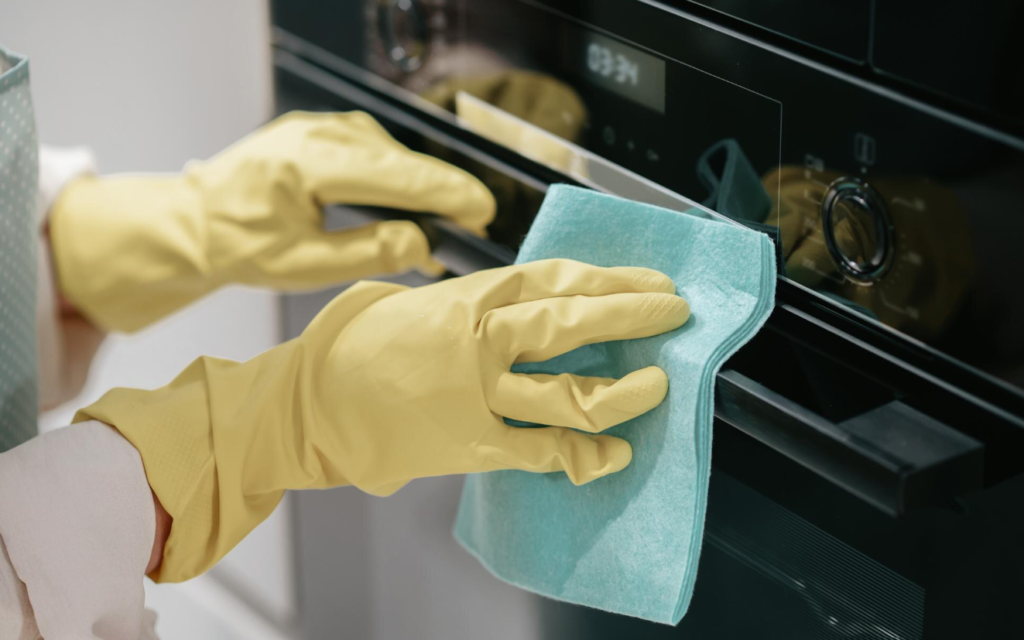
Kitchen floors and the area behind and beside the stove and refrigerator need weekly mopping and attention that daily surface habits do not cover. Grease that travels through the air during cooking settles on kitchen floors and creates a thin, sticky film that builds up over time and becomes a bacterial and pest attractant. Mopping the kitchen floor weekly with an appropriate cleaner for the floor type removes this invisible film before it becomes a significant hygiene issue. Wiping down the exterior surfaces of all kitchen appliances, including the refrigerator door handles and the front panel of the dishwasher and oven, weekly addresses the bacterial accumulation on high-touch surfaces that daily cleaning tends to skip.
Living areas need weekly dusting of all flat surfaces and vacuuming of all upholstered furniture in addition to the floor. Upholstered sofas and chairs are major reservoirs of dust, skin cells, pet dander, and allergens that most people do not think to address regularly. Running a vacuum with a soft brush attachment over the cushions and fabric surfaces of living room furniture weekly dramatically reduces the allergen load of the room and keeps the furniture looking and smelling better for longer. Cushions should be turned or rotated as part of this process to distribute wear and expose different surfaces to air.
The Role of Deeper Cleaning and Professional Support in a Consistent System
Daily and weekly cleaning habits maintain the baseline, but some parts of a home need attention on a monthly, seasonal, or annual basis that goes beyond what these habits cover. Knowing what these tasks are and when to do them, or when to bring in professional support, completes the picture of a genuinely consistent and health-supporting cleaning system.
Monthly cleaning tasks include descaling showerheads and faucet aerators that have accumulated mineral deposits, cleaning the inside of the refrigerator including the door seals and the area under produce drawers, wiping down cabinet interiors in the kitchen, deep cleaning the bathroom grout and toilet base, and cleaning behind and under appliances that get moved quarterly. These are tasks that take longer than daily or weekly jobs but do not need to happen as often, and scheduling them on the first weekend of each month removes the need to decide when they should happen.
Seasonal cleaning extends to the areas of a home that accumulate buildup over months and require a complete reset to address properly. Inside kitchen cabinets, window tracks and frames, baseboards throughout the home, ceiling fans and light fixtures, and the interior of the oven are all areas that benefit from seasonal attention. A home that receives a thorough seasonal clean stays at a higher overall standard throughout the year and requires less effort during weekly cleaning because the background level of buildup is kept lower.
Professional house cleaning services play a specific and valuable role in a consistent home cleaning system. They are not a replacement for daily and weekly habits, and they work best when the home is being maintained between visits. What they offer is the depth of cleaning that personal effort rarely achieves, access to professional products and equipment, and the consistency of a scheduled appointment that happens whether or not there is time and energy for it on any given week. Recurring maid cleaning services from home cleaning experts keep a home at a standard that is difficult to maintain purely through personal effort, particularly for busy families and working households where competing demands make consistent thorough cleaning genuinely challenging.
Heavenly Maids Cleaning Services in San Jose provides recurring residential cleaning services throughout the Bay Area with a commitment to the kind of consistent, detailed cleaning that supports both the appearance and the health of the homes they service. For households that want to build a cleaning system that works in the long term, professional support from experienced home cleaning experts fills the gap between what daily habits accomplish and what a genuinely healthy home requires. Deep cleaning services done periodically alongside regular maintenance visits reset the home’s baseline and make the daily and weekly habits more effective because they are working from a cleaner starting point.
The healthiest home cleaning system is one built on prevention, consistency, and the right level of attention for each area of the home at each frequency that it needs. Daily habits stop problems before they start. Weekly routines address what daily habits leave behind. Monthly and seasonal tasks manage the deeper accumulation that neither can fully handle. And professional support, scheduled regularly, handles the work that personal effort alone cannot sustain over time. Together, these layers produce a home that is genuinely clean in a way that supports health, reduces allergen exposure, and makes daily life more comfortable for everyone in it.
Most people think about dust as something that makes a room look dirty. It settles on shelves, covers furniture surfaces, and collects in corners. The solution seems simple enough: wipe it away and move on. But dust does something far more consequential in a place most people never think to look. It settles inside and around electronics, and the damage it causes there is slow, invisible, and often expensive. Televisions, computers, gaming consoles, routers, speakers, printers, and kitchen appliances with electronic components are all affected by dust accumulation in ways that shorten their lifespan, reduce their performance, and in some cases create genuine safety hazards.
The connection between a dusty home and malfunctioning electronics is not one most people make until something stops working. By then, the damage has usually been building for months or years. Understanding how dust affects electronics, why it causes the specific problems it does, and what can be done to prevent accumulation from reaching harmful levels gives homeowners and business owners a practical edge in protecting equipment that represents a significant financial investment.
How Dust Physically Damages Electronics
Dust is not a single substance. It is a mixture of fine particles that includes skin cells, fabric fibers, pet dander, pollen, soil particles tracked in from outside, and combustion byproducts from cooking and candles. All of these particles are extremely light and remain suspended in the air for extended periods before settling. When they settle on or inside electronics, they create several distinct types of damage depending on where they land and how densely they accumulate.
The most well-documented effect of dust on electronics is thermal damage caused by insulation. Electronic components generate heat as a normal part of their operation, and they are designed with cooling systems, most commonly fans and heat sinks, that move heat away from sensitive parts and out of the device.
When dust accumulates on a heat sink, which is the metal component specifically designed to absorb and dissipate heat from a processor or other high-heat component, it acts as an insulating layer that traps heat rather than allowing it to dissipate. The processor or other component beneath the dust-coated heat sink runs hotter than it is designed to operate, which stresses the component and accelerates the degradation of its internal materials.
Computer processors, graphics cards, and power supplies are the components most susceptible to this type of thermal damage. A desktop computer that has accumulated a year or more of dust on its internal heat sinks and cooling fans may run at temperatures thirty to forty degrees Celsius higher than the same computer would run in a clean state. This temperature difference is not trivial. It directly correlates with reduced component lifespan. The rule of thumb in electronics engineering is that for every ten degrees Celsius above the designed operating temperature, the lifespan of semiconductor components is roughly halved. A computer running hot from dust accumulation does not just perform poorly. It ages faster at a fundamental material level.
Cooling fans suffer a separate but related problem from dust accumulation. Fans inside computers, gaming consoles, and other electronics develop a coating of dust on their blades over time. This coating adds uneven weight to the blades, causes vibration, and increases the load on the fan motor. Dust-coated fans spin more slowly, create more noise, and move less air than clean fans.
A fan that is running slowly because of dust buildup is moving less cooling air through the device at exactly the time when the device needs maximum airflow, compounding the thermal problem. Eventually, a heavily dust-coated fan motor may fail entirely, leaving the device without any active cooling at a point when the heat sinks are already compromised by their own dust layer.
Beyond thermal effects, dust causes electrical problems in electronics through a mechanism called bridging. When conductive dust particles, particularly metallic particles from machining or carbon particles from combustion, accumulate on a circuit board in sufficient density, they can create unintended electrical pathways between components that are supposed to be isolated from each other. This is called a short circuit, and it can permanently damage components or, in severe cases, cause a failure that results in fire. Even non-conductive dust particles absorb moisture from the air, and moist dust on a circuit board becomes conductive enough to cause intermittent electrical faults that are extremely difficult to diagnose because they appear and disappear as humidity levels change.
The Specific Electronics Most Affected by Dust and Why
Not all electronics are equally vulnerable to dust accumulation. Some devices, by the nature of their design, pull large volumes of air through their interiors and accumulate dust at a much faster rate than sealed or passively cooled devices.
Desktop computers are among the most vulnerable devices in any home or office because they are designed with large internal fans that actively pull air from the room through the interior of the case. Every cubic foot of air that passes through the computer deposits some of its suspended particles on the internal components. In a typical home environment, a desktop computer that is used daily will accumulate a significant and potentially problematic layer of dust on its internal components within six to twelve months without cleaning.
Gaming consoles face the same active airflow problem. They run high-performance processors and graphics hardware in a compact chassis, generate substantial heat, and rely on a single fan pulling room air through the interior. The fan intake and exhaust vents on a gaming console are small, which means dust accumulates in these openings and restricts airflow more quickly than it would in a larger chassis with more ventilation area. A gaming console that has been in use for several years without internal cleaning will often run its fan at maximum speed constantly, produce noticeably more noise than when new, and may shut itself down due to thermal overload, which is the device’s protective response to overheating.
Televisions, particularly those with active cooling, accumulate dust on the internal components and vents in ways that affect both operating temperature and picture quality over time. The power supply inside a television is one of the components most affected by dust because it generates significant heat and relies on passive or active cooling to manage it. A television that runs hotter than designed may develop picture quality issues, experience component failures, or in extreme cases, present a fire risk from overheated components surrounded by accumulated dust, which is a combustible material.
In office environments, the density of electronics and the longer operating hours compared to residential settings make dust accumulation a more acute problem. Computers running eight to ten hours a day in an office accumulate dust faster than those used a few hours at home, and the consequences of a computer failure in a business context are more severe in terms of lost productivity and data. Commercial cleaning services for offices that include attention to the electronic equipment environment, meaning the surfaces around, behind, and above where electronics operate, contribute directly to the longevity and performance of business equipment.
Printers are frequently overlooked in conversations about dust and electronics, but they are particularly sensitive to dust because they contain precision mechanical components alongside electronic ones. Dust on a printer’s paper feed rollers causes paper jams. Dust on optical sensors inside a printer causes misalignment errors and print quality problems. Dust that settles on the print head area of an inkjet printer can cause clogging and permanent damage to the print head, which is often the most expensive component to replace. Regular cleaning of the exterior and accessible interior surfaces of a printer prevents the particle accumulation that causes these problems.
What Proper Dust Management Looks Like in a Home or Office
Managing dust around electronics requires a consistent approach that addresses both the surfaces where dust settles and the broader environment that generates and circulates it. Cleaning electronics themselves requires specific tools and methods that differ from general surface cleaning, while managing the room environment reduces the rate at which dust accumulates on all surfaces including electronic ones.
For the electronics themselves, compressed air is the most effective tool for removing dust from vents, keyboards, ports, and accessible interior spaces. Using a can of compressed air to blow dust out of a computer’s ventilation openings every three to six months is one of the simplest and most effective preventive maintenance steps available for any actively cooled device.
The air should be directed so that dust is blown out of the device rather than deeper into it, and the device should be turned off and unplugged before any cleaning begins. For desktop computers, removing the side panel and using compressed air to clean heat sinks, fans, and the motherboard surface is more effective than cleaning through the ventilation openings alone, but this requires some comfort with the device’s interior and should only be done by someone familiar with proper grounding and handling procedures for electronic components.
Microfiber cloths are the appropriate tool for cleaning the exterior surfaces of electronics. They are soft enough not to scratch screens and housings, they hold the dust particles they collect rather than redistributing them, and they do not shed fibers that could enter ventilation openings and add to the internal dust load.
Paper towels, which are commonly used to wipe electronics because they feel soft, actually have a fiber structure rough enough to cause micro-scratches on screens and plastic housings over time, and they leave behind paper fibers. For screens specifically, a dry microfiber cloth or one very slightly dampened with distilled water is the correct tool. Cleaning products containing alcohol or ammonia should not be used on screens with anti-reflective coatings because they dissolve the coating permanently.
The broader home or office environment plays a significant role in how quickly dust accumulates on electronics. A room with high-traffic carpets generates more airborne particulate than a room with hard flooring because foot traffic on carpet continuously launches fine particles into the air that then settle on every surface including electronics. Detailed home cleaning services for busy families that include thorough dusting of all surfaces in rooms where electronics operate, done consistently as part of recurring maid cleaning services, reduce the rate of dust accumulation on electronics between dedicated electronic cleaning sessions.
The placement of electronics also affects how quickly they accumulate dust. Electronics placed at floor level or near the floor are exposed to higher concentrations of airborne particles because larger particles settle lower in the air column. A gaming console placed on the floor next to a carpet will accumulate dust significantly faster than the same console elevated on a shelf. Electronics positioned near frequently opened doors or windows accumulate pollen and outdoor particulate in addition to indoor dust. Keeping electronics elevated, away from high-traffic floor areas, and away from direct airflow from ventilation openings reduces their dust exposure without any additional cleaning effort.
Heavenly Maids Cleaning Services in San Jose provides residential cleaning and office cleaning services across the Bay Area with attention to the kinds of detail that make a real difference in the condition of a home or workplace over time. Regular professional house cleaning that maintains low dust levels throughout a space is one of the most effective environmental protections available for electronic equipment, and it operates continuously between the specific electronic cleaning sessions that devices themselves require.
The financial value of protecting electronics through consistent cleaning is straightforward. A desktop computer that costs several hundred to several thousand dollars and is expected to last four to six years may fail in two to three years if dust accumulation has been causing it to run hot throughout that period. A gaming console that costs several hundred dollars and develops a failed fan from dust-related motor wear requires either an expensive repair or full replacement.
A television with a failed power supply from thermal stress costs significantly more to repair than the occasional cleaning session that would have prevented the failure. The cost of keeping electronics clean is a fraction of the cost of replacing electronics that have failed from preventable causes, and the cleaning itself is straightforward when it is done regularly rather than deferred until visible accumulation has already caused performance problems.
Cleaning feels like one of those things you cannot really get wrong. You pick up a product, apply it to a surface, scrub if needed, and the job is done. Most people learn how to clean from watching others do it and from trial and error over years of maintaining their own space. The problem with this approach is that some of the most damaging cleaning mistakes look completely normal while they are happening.
There is no immediate sign that anything has gone wrong. The floor looks clean. The window looks streak-free. The bathroom tile looks bright. But over weeks, months, and years, the cumulative effect of certain cleaning habits causes surface degradation, material breakdown, and permanent damage that no amount of cleaning can reverse.
Understanding which common cleaning mistakes cause lasting harm, and why they cause it, changes how you approach house cleaning in a fundamental way. It also explains why some homes look noticeably older and more worn than others of the same age, despite both being cleaned regularly. The difference is not always how often cleaning happens. Sometimes it is what cleaning does to the surfaces over time when the wrong methods or products are used.
Using the Wrong Product on the Wrong Surface
One of the most widespread and damaging cleaning mistakes is using the same product on every surface in the home regardless of what that surface is made of. Many homeowners have one or two go-to cleaners that they use everywhere, from bathroom tile to kitchen counters to hardwood floors to stainless steel appliances. The logic seems reasonable: if it cleans one thing, it should clean everything. But different materials have very different chemical tolerances, and a product that is perfectly safe on one surface can cause irreversible damage on another.
Bleach is the most common example of this problem. It is effective at disinfecting and whitening on certain surfaces, but it degrades natural stone like marble, travertine, and granite on contact. The alkaline chemistry of bleach reacts with the calcium carbonate in stone, etching the surface and dulling the finish in a way that cannot be polished out easily. Grout that is repeatedly cleaned with bleach-based products eventually weakens and crumbs at the edges, requiring replacement rather than cleaning. Many homeowners use bleach on bathroom grout for years thinking it is keeping the grout white when it is actually slowly destroying the material. Once grout begins to crumble, no cleaning approach can restore it.
Vinegar is another product that causes significant damage when misapplied. It is widely recommended as an eco-friendly home cleaning solution, and it is genuinely effective on many surfaces. But vinegar is acidic, and acid dissolves the sealant on natural stone surfaces and the calcium-based compounds in grout over time. Using vinegar to clean marble countertops, limestone tile, or any unsealed stone surface etches the material and leaves a permanently dulled finish that requires professional re-polishing to address, if it can be addressed at all. The damage from repeated vinegar use on stone accumulates over years and becomes most apparent when the surface is compared to how it looked when new.
Abrasive cleaners and scrubbing pads are another source of lasting surface damage that many people do not recognize as a problem while it is happening. Scrubbing powder, steel wool, and the rough green side of a standard kitchen sponge are abrasive enough to scratch stainless steel, acrylic tub surfaces, glass cooktops, and the glaze on ceramic and porcelain fixtures. The scratches created by abrasive cleaning are microscopic at first and completely invisible, but they accumulate with each cleaning and eventually create a dull, cloudy appearance on what was originally a polished surface.
Once a surface has been scratched at this level, it is also more difficult to clean because bacteria and dirt settle into the micro-scratches and hold there even after wiping. The smoother a surface is, the easier it is to clean. Abrasive methods do the opposite of what cleaning is supposed to accomplish over the long term.
Glass surfaces deserve particular attention in this context. Windows, shower glass, and glass cooktop surfaces all sustain damage from the wrong cleaning tools and products. Paper towels, which seem like a reasonable choice for wiping glass, have a fiber structure coarse enough to scratch glass over time. Ammonia-based glass cleaners used repeatedly on tinted or coated windows break down the tint film and the coatings applied to low-emissivity glass, reducing the energy efficiency of the window and causing permanent discoloration. Professional interior and exterior window cleaning uses the right tools and solutions for each type of glass, which is one of the reasons professional results last longer and look better than most DIY window cleaning attempts.
Mistakes That Damage Floors Over Time
Floors take more abuse from incorrect cleaning than almost any other surface in a home, largely because they are cleaned most frequently and because the damage accumulates slowly enough that it is rarely connected to the cleaning method being used.
Wet mopping hardwood floors is one of the most damaging common cleaning mistakes in residential cleaning. Hardwood is a porous material that absorbs moisture, and standing water or excess moisture from a wet mop causes the wood to swell, warp, and buckle over time. The finish on a hardwood floor is designed to repel some moisture, but it is not waterproof, and repeated wet mopping introduces water at the board seams and edges where the finish is thinnest. The damage from wet mopping accumulates over years and eventually causes boards to cup, swell at the edges, and develop a wavy or uneven surface that requires sanding and refinishing to correct.
Hardwood floors should be cleaned with a barely damp mop or a microfiber mop specifically designed for hardwood, using a pH-neutral cleaner formulated for the material. Floor cleaning and polishing services from experienced home cleaning experts use the correct method for each floor type, which is one of the simplest ways to protect a significant investment in flooring.
Using too much cleaning product on any floor is a related mistake that causes lasting damage in a different way. Many people believe that more soap means more cleaning power, but excess cleaning product on floors, particularly on tile, vinyl, laminate, and hardwood, leaves behind a residue that builds up with each cleaning. This residue layer becomes sticky over time and attracts more dirt, making the floor look perpetually dirty even directly after cleaning.
On tile floors, product buildup dulls the glaze and makes the surface look hazy. On hardwood, it creates a film that makes the floor look worn and flat. Removing this kind of multi-layer buildup requires stripping the floor, which is a much more involved process than the regular cleaning that would have prevented the buildup in the first place.
Steam mops on sealed hardwood or laminate flooring cause a specific and serious type of damage that is worth understanding. Steam introduces high heat and moisture simultaneously, which is particularly damaging to laminate flooring where the layers are bonded with adhesive that heat degrades over time. Steam also forces moisture into the seams of both hardwood and laminate far more aggressively than a wet mop does, accelerating swelling and separation at the joints.
Many flooring manufacturers specifically void warranties when steam cleaning is used on their products, which indicates how significant the damage potential is. This mistake is especially common because steam mops are marketed as a powerful and hygienic cleaning tool, which they are on appropriate surfaces like ceramic tile. The problem is using them on surfaces where the heat and moisture cause more harm than the cleaning does good.
Carpet cleaning done incorrectly at home is another source of lasting damage that deserves serious attention. Consumer-grade carpet cleaning machines used without proper technique leave excess moisture in the carpet and padding, which creates ideal conditions for mold to develop below the surface where it is not visible. Over-wetting a carpet during cleaning can take days to dry completely in the padding layer, and if the home’s humidity is already moderate, mold can establish itself in that time. Professional-grade carpet cleaning using properly calibrated hot water extraction controls moisture levels precisely, which is one of the key reasons professional results differ from DIY machine rental results in terms of both cleaning effectiveness and the absence of post-cleaning problems.
Mistakes That Compound Over Time in Kitchens and Bathrooms
Kitchens and bathrooms are the two rooms most frequently cleaned in any home, and they are also the two rooms where cleaning mistakes cause the most cumulative damage because the high frequency of cleaning means the wrong technique gets applied over and over in a short period.
Using the wrong product on stainless steel appliances is one of the most common kitchen cleaning mistakes. Stainless steel has a grain direction, and cleaning across the grain with an abrasive material leaves visible scratches that permanently alter the appearance of the surface. Products containing chlorine should never be used on stainless steel because chlorine causes a chemical reaction that permanently pits and discolors the metal.
Many homeowners clean their stainless steel refrigerator, dishwasher, or stove with a chlorine-based kitchen spray without realizing the damage being done, because the pitting and discoloration develop slowly and are often attributed to age rather than the cleaning method. Cleaning stainless steel correctly means using a product specifically formulated for it, wiping with the grain using a soft microfiber cloth, and avoiding any product containing chlorine or abrasive particles.
Toilet bowl cleaners left in the bowl longer than directed are a frequent cause of lasting damage to porcelain fixtures. Many of these products are highly acidic or alkaline and cause etching on the porcelain surface when contact time is extended beyond what the product specifies. Once porcelain is etched, it becomes rougher at a microscopic level and much harder to keep clean because bacteria and mineral deposits adhere more easily to the compromised surface. The result is a toilet that stains faster and requires harsher cleaning to look clean, which continues the cycle of damage.
Mixing cleaning products in a bathroom is a safety issue that also causes lasting surface damage. Bleach mixed with ammonia-based cleaners produces toxic gas and is a serious health hazard. Bleach mixed with acidic cleaners like vinegar or certain toilet bowl products also produces chlorine gas. Beyond the health risk, the chemical reactions these combinations create can stain, etch, and permanently discolor the surfaces they contact.
Bathroom tile, grout, fixtures, and even the air in an enclosed bathroom space are all affected by the products used in that room. Professional kitchen and bathroom cleaning uses products that are appropriate for each specific surface, applied in the correct sequence to avoid chemical interactions, which is a level of product knowledge that most homeowners do not have.
Heavenly Maids Cleaning Services in San Jose provides residential cleaning and deep cleaning services throughout the Bay Area with the product knowledge and surface expertise that prevents these common cleaning mistakes from damaging the homes they service. For families and property owners who want their home’s surfaces protected rather than worn down over time, working with experienced home cleaning experts who understand which products and methods belong on which surfaces is one of the most practical investments available. Cleaning done correctly maintains a home’s surfaces in better condition for longer and avoids the restoration and replacement costs that incorrect cleaning methods cause over time.
The best cleaning routine is one that actually protects what it touches. Using the right product on the right surface, avoiding excess moisture on materials that absorb it, choosing non-abrasive tools on polished or delicate surfaces, and keeping cleaning chemicals separated are habits that take only a small amount of additional knowledge to build. That knowledge, applied consistently through recurring maid cleaning services or through informed personal cleaning habits, is what separates a home that looks well-maintained after years of cleaning from one that looks prematurely aged despite being cleaned just as often.
Regular cleaning keeps a home looking presentable. You wipe counters, vacuum floors, scrub the bathroom, and take out the trash. Done consistently, this kind of maintenance cleaning makes daily life more comfortable and keeps visible mess under control. But there is a category of cleaning that goes much deeper than daily or weekly upkeep, and it only gets done properly when it is scheduled intentionally. Seasonal deep cleaning is that category, and the homes and offices that benefit most from it are the ones where people understand why it matters and make it a consistent part of how they care for their space.
A seasonal deep clean happens four times a year, aligning roughly with the change of each season. Each session addresses the areas, surfaces, and systems in a home or commercial space that accumulate buildup over weeks and months without being part of a regular cleaning routine. These are not forgotten areas in a messy home.
They are the areas that even a well-maintained home glosses over because they are out of sight, difficult to reach, or simply not part of the weekly cleaning habit. The purpose of a seasonal deep clean is to reset those areas before the buildup becomes a problem, and the difference between a home that gets seasonal deep cleaning and one that does not becomes visible and felt over time.
What Seasonal Deep Cleaning Covers That Regular Cleaning Does Not
The gap between regular cleaning and seasonal deep cleaning is not a matter of trying harder or spending more time on the same tasks. It is about addressing entirely different areas and levels of a home that weekly routines are not designed to reach.
Inside kitchen cabinets is a good example. Most people wipe cabinet doors and drawer fronts as part of regular cleaning, but the interior of cabinets, where food particles, crumbs, spilled oils, and residue from stored products accumulate, rarely gets attention between major cleaning sessions. Seasonal deep cleaning empties and wipes down the interior of every cabinet and drawer, removes the residue that builds up on shelves, and cleans the surfaces where food is stored before that residue attracts pests or affects the condition of stored items. The same applies to the pantry, which develops its own layer of crumbs, spills, and dust that goes unaddressed until a seasonal clean makes it a priority.
Behind and under large appliances is another category. Refrigerators, stoves, washing machines, and dryers all have significant buildup accumulating behind and underneath them that no amount of regular cleaning reaches. Grease, food debris, and dust collect in these areas and stay undisturbed for months. Moving appliances out and cleaning the floor and wall surfaces behind them is a standard part of professional seasonal deep cleaning and one of the tasks that most people acknowledge they have never done.
Walls and baseboards are surfaces that most people associate with painting rather than cleaning, but they collect dust, scuffs, grease in cooking areas, and residue from daily contact that changes how they look over time. Wiping walls from top to bottom and cleaning baseboards and trim thoroughly is a seasonal deep cleaning task that makes a room look visibly refreshed without any new paint.
Light fixtures and ceiling fans collect dust on their surfaces and inside their shades and housing in quantities that affect the quality and color of the light they produce. Cleaning these thoroughly on a seasonal basis is the kind of task that seems minor until you do it and notice how much material was there.
Window tracks, frames, and sills are areas where seasonal cleaning makes a particularly visible difference. Dirt, dead insects, dust, and debris compact into window tracks over months of use and make windows harder to operate while creating a concentrated pocket of grime in a visible location. A seasonal deep clean clears this buildup completely, restores smooth window operation, and removes the kind of visible dirt that regular quick cleaning passes over.
Inside the refrigerator, including the door seals and the space under the produce drawers, accumulates residue that most people address only when something spills noticeably. A seasonal clean of the refrigerator interior removes the residue that builds up gradually, addresses odors before they become persistent, and allows for an inspection of the door gaskets for any mold or cracking that affects the seal.
Bathrooms benefit from seasonal deep cleaning that goes beyond the regular scrub. Grout lines throughout the bathroom gradually absorb mineral deposits, soap residue, and biological matter that regular scrubbing with a general cleaner does not fully remove. A seasonal treatment with appropriate grout-specific products restores the appearance of tile surfaces and removes the biological matter that contributes to odor and staining. Showerheads and faucet aerators accumulate mineral deposits that affect water flow and should be removed and soaked seasonally.
Why Timing and Frequency Matter
The reason seasonal deep cleaning aligns with the change of seasons is practical, not arbitrary. Each season transition brings different challenges and different reasons to address specific areas of the home.
Spring is the most widely recognized time for deep cleaning because it follows winter, during which homes are closed up for extended periods, heating systems run continuously, and the combination of dry indoor air and reduced ventilation allows dust and particles to accumulate at a faster rate. A spring deep clean addresses everything that built up during the closed-up winter months and prepares the home for the warmer season when windows open more frequently and activity levels increase.
Summer deep cleaning addresses the buildup from increased activity, more frequent cooking, more foot traffic from outdoor areas, and the higher humidity that accelerates biological growth in bathrooms and kitchens. It is also a good time to address outdoor areas and exterior surfaces that are most accessible in warm, dry weather.
Fall deep cleaning prepares the home for the months when it will again be sealed up against cold weather. Cleaning thoroughly before the heating system begins running at full capacity prevents the season’s accumulated dust and debris from being pushed through the home continuously once windows close for winter.
Winter deep cleaning, while less common as a general habit, is valuable for the interior spaces that see the most use during the cold months, particularly kitchens, living rooms, and bedrooms where families spend the most time when outdoor activities are limited.
Skipping seasonal deep cleaning does not mean nothing happens in those areas. It means the buildup continues to accumulate, and what would have been a manageable cleaning task at four months becomes a much more significant project at eight or twelve. The longer the intervals between deep cleans, the harder the work and the more product, time, and effort the cleaning requires. Regular seasonal cleaning is almost always faster and less labor-intensive than an infrequent major clean that has to address years of accumulated buildup.
How Professional Seasonal Deep Cleaning Differs From DIY
There is real value in doing as much of your own seasonal deep cleaning as possible. The effort that goes into clearing out cabinets, moving furniture, and cleaning areas that get overlooked is worthwhile and makes a meaningful difference in the condition of the home. But there are specific aspects of seasonal deep cleaning where professional services consistently produce better results than DIY approaches, and understanding where that line is helps you decide where to invest in professional help.
Professional kitchen and bathroom cleaning at a seasonal deep-clean level covers grout restoration, appliance cleaning inside and out, fixture descaling, and under-sink inspection and cleaning in a way that most homeowners do not achieve on their own. Trained cleaners work with products and tools appropriate for each surface type and have the experience to identify issues like early mold growth in caulking or seal deterioration around fixtures that a less experienced eye might miss.
Floor cleaning and polishing services for hard floors cover stripping old product buildup from sealed floors, applying fresh sealant or polish where appropriate, and restoring the appearance of floors that have developed a dull or uneven finish over months of use. This level of floor care goes beyond mopping and is something most homeowners do not have the equipment or products to perform effectively on their own.
Sanitization and disinfecting services applied as part of a seasonal deep clean address the bacterial load on high-contact surfaces throughout the home in a way that general-purpose cleaning products do not achieve. This is particularly relevant in kitchens, bathrooms, and any space where food is prepared or where vulnerable household members spend significant time.
Heavenly Maids Cleaning Services in San Jose provides seasonal deep cleaning for homes and offices across the Bay Area, covering the full scope of what a proper seasonal reset requires. From detailed home cleaning services for busy families to premium residential deep cleaning for larger properties, the work is done with the thoroughness and consistency that seasonal maintenance deserves.
For offices and commercial spaces, seasonal commercial cleaning helps businesses maintain a professional environment, address the buildup that daily janitorial services do not reach, and provide employees with a workspace that is genuinely clean rather than just tidied. High-end commercial janitorial services that include seasonal deep cleaning components keep commercial environments in better long-term condition and reduce the deterioration of surfaces and finishes that comes from extended periods without deep maintenance.
Seasonal deep cleaning is one of the most practical investments a homeowner or property manager can make in the ongoing condition of a space. It costs less than the repairs and restoration work that deferred maintenance eventually requires. It produces better health outcomes for the people living and working in the space. And it keeps a home or office in the kind of condition that daily and weekly cleaning alone can never fully maintain. The value of doing it consistently, four times a year without exception, compounds over time in ways that are visible in the condition of every surface, fixture, and room in the building.
Most people assume the air inside their home is cleaner than the air outside. It feels like a reasonable assumption. The home is enclosed, away from traffic, exhaust, and outdoor pollution. But the truth is that indoor air quality is often worse than outdoor air quality, sometimes significantly so. The Environmental Protection Agency has noted that indoor air can be two to five times more polluted than outdoor air, and in some cases even more.
The reason is not that homes are particularly dirty places. It is that they are enclosed environments where pollutants accumulate without the natural ventilation that outdoor spaces have. Dust, mold spores, pet dander, volatile organic compounds from furniture and cleaning products, cooking residue, and particles from the HVAC system all build up in a sealed indoor environment and stay there until something actively removes them.
What makes this problem harder to manage is that poor indoor air quality does not always announce itself clearly. There is no alarm that goes off when particle levels cross a threshold. The signs tend to be subtle and easy to attribute to something else entirely: a cold that will not fully go away, morning congestion that clears up once you leave the house, headaches that seem to come and go without obvious cause, or eyes that water inside the home but not outdoors.
These are not random annoyances. They are often the body’s response to breathing compromised air day after day. Knowing the specific signs of poor indoor air quality and understanding what causes each one gives homeowners the information they need to take action before the problem affects health in a more serious way.
Physical Symptoms That Often Point to Indoor Air Problems
The body tends to react to poor air quality before the home shows any visible signs of a problem. Many people live with these symptoms for months or years without connecting them to the air inside their home, which is why understanding the pattern matters.
Persistent respiratory symptoms are among the most common indicators. This includes a cough that lingers long after a cold has passed, frequent throat clearing, mild wheezing, or a nose that is constantly congested without a clear viral cause. When these symptoms are worse in the morning after sleeping, or when they are noticeably better on days spent away from home, the indoor environment is almost certainly contributing. The bedroom is particularly significant because people spend six to nine hours breathing the air in that single room during sleep.
A bedroom with dusty carpets, dirty air vents, or an uncleaned mattress exposes the sleeping person to elevated levels of dust mite debris, mold spores, and fine particles for hours at a time, which the respiratory system responds to in exactly the ways described.
Frequent headaches that appear during time at home and fade when you leave are another pattern worth paying attention to. Elevated levels of carbon dioxide, which build up in poorly ventilated rooms, cause headaches and cognitive sluggishness. Volatile organic compounds from paints, adhesives, synthetic carpets, pressed wood furniture, and cleaning products also cause headaches at elevated concentrations. New furniture, recent painting, or a newly renovated space often has elevated VOC levels that dissipate over weeks, but in a home with poor ventilation, this process takes much longer and the occupants breathe those compounds throughout.
Fatigue that seems disproportionate to your activity level or sleep quality is another symptom associated with compromised indoor air. When the body is constantly working to filter out airborne irritants and managing low-level immune responses to allergens, it uses energy that would otherwise be available for other functions. People who live in homes with high allergen loads often feel more tired than they should and find it harder to concentrate without ever identifying indoor air quality as a contributing factor.
Skin irritation, including dryness, itchiness, and rashes that appear without a clear dietary or contact cause, can also be a response to airborne particles and low humidity in a home. Dust mite debris and mold spores are known skin irritants in addition to respiratory ones, and people with sensitive skin may notice reactions that correlate with time spent in specific rooms or parts of the home.
Eye irritation that occurs primarily indoors is another telling sign. Watery, itchy, or red eyes that improve when you go outside and return when you come back in point clearly to something in the indoor air. Airborne particles, pet dander, and mold spores are common triggers for this kind of eye response.
Environmental Signs Inside the Home That Signal Air Quality Issues
Beyond physical symptoms, there are things you can observe inside the home itself that indicate the air quality is compromised. These signs are worth knowing because they allow you to identify the problem before it reaches the level where it is causing noticeable health effects.
A musty or stale smell that persists even after cleaning and ventilating a room is one of the clearest environmental indicators of a problem. Musty odors are almost always caused by mold or mildew, and when the smell is present even after the visible surfaces have been cleaned, it usually means mold is growing in a location that is not visible. Behind walls near plumbing, inside wall cavities where moisture has seeped in, under flooring in areas with a slow leak, and inside air ducts are all common hidden locations where mold establishes itself and releases spores continuously into the air. The smell is the mold telling you it is there, even when you cannot see it.
Dust that returns to surfaces very quickly after cleaning is another sign. If you dust a room thoroughly and find a visible layer has reformed within a day or two, the air in that space has a high particle load that is settling continuously. This happens most often in homes where the HVAC system is pushing dusty air through the vents from contaminated ductwork, or in spaces with poor filtration where fine particles circulate without being captured. The dust you see on surfaces represents only a fraction of what is suspended in the air at any given moment.
Condensation on windows and walls, especially in bathrooms and kitchens, is a reliable sign of excess indoor humidity. Humidity above fifty percent creates the conditions where mold and dust mites thrive. Persistent condensation means the home’s ventilation is not adequately removing moisture from the air, and mold growth is likely either already present or developing in the areas with the highest moisture concentration. The window frames and sills where condensation collects are among the first places to check for mold growth when this pattern is observed.
Visible mold growth anywhere in the home, even a small amount on grout or around a window frame, is a sign that conditions throughout the home are favorable for mold. Where visible mold appears, spores are being released into the air of that room and circulating to adjacent spaces through air movement and the HVAC system. Small visible mold patches often indicate larger hidden growth nearby, particularly if they appear in areas with ongoing moisture exposure.
Increased allergy and asthma symptoms that correlate with time spent at home, or that have worsened over time without a clear external explanation, are a strong collective indicator that indoor air quality has declined. When medication needs increase or when symptoms that were previously well-managed become harder to control, the home environment deserves examination.
Uneven temperatures between rooms, or rooms that never seem to feel comfortable regardless of thermostat settings, can indicate problems with the HVAC system that also affect air quality. A system that is not moving air properly through the home creates stagnant zones where particles accumulate and humidity levels differ from the rest of the house.
How Cleaning Addresses Poor Indoor Air Quality
Understanding the sources of indoor air quality problems makes it much easier to address them effectively. The most common contributors fall into several distinct categories, and cleaning plays a direct role in reducing or eliminating most of them.
Dust and particulate accumulation is the most widespread cause of diminished indoor air quality in homes. Dust in a home is not just inert material. It is a complex mixture of skin cells, textile fibers, pet dander, pollen, mold spores, and dust mite debris, all of which become airborne when disturbed and cause respiratory irritation when inhaled. Carpets are the single largest reservoir of particulate matter in most homes. They trap and hold everything that settles into them, and regular vacuuming with a standard vacuum only addresses the upper layer.
Professional carpet cleaning using hot water extraction removes what has accumulated in the deeper layers of the carpet fiber and the padding beneath, dramatically reducing the particulate reservoir that contributes to poor air quality in carpeted rooms. For homes with pets, carpet cleaning for pet stains and odors also removes the dander and biological residue that ordinary cleaning leaves behind.
Air ducts are the most overlooked source of indoor air quality problems in both residential and commercial spaces. The HVAC system moves air through every room in the home multiple times each day, and whatever has accumulated inside the ductwork travels with that air. Dust, mold spores, pet dander, and debris that build up inside duct walls over months and years get pushed into the living space continuously.
Professional duct cleaning removes this accumulated material from inside the system and produces an immediate and lasting improvement in the cleanliness of the air circulating through the home. Dryer vent cleaning, done alongside duct cleaning, addresses a separate but related system that can push lint particles and moisture back into the home when the vent is restricted or blocked.
Mold is one of the most health-significant contributors to poor indoor air quality, and it is one that cleaning alone can address when caught early but that may require professional remediation when it has spread significantly. Bathrooms, kitchens, laundry areas, and any space with recurring moisture are the most common locations. Professional kitchen and bathroom cleaning that includes grout, caulking, fixture bases, and under-sink areas removes early mold growth before it spreads and reduces the spore count in those high-moisture spaces. Sanitization and disinfecting services that use appropriate fungicidal products on bathroom surfaces keep mold from re-establishing itself between cleanings.
Window frames, sills, and tracks are a concentrated source of both mold and pollen that most homeowners underestimate. Moisture collects in window tracks, mold grows in the grooves, and pollen accumulates on sills and is released into the room every time the window is moved. Interior and exterior window cleaning that includes thorough attention to frames and tracks removes both the mold and the pollen concentration that worsens indoor air quality, particularly during high pollen seasons.
HVAC filters are the mechanical component most directly responsible for what stays in the air. A filter that is overdue for replacement captures less and less of what passes through it, allowing more particles to circulate through the home. Upgrading to a higher-rated filter and replacing it on schedule is one of the simplest maintenance steps available for improving indoor air quality between professional cleaning visits.
Heavenly Maids Cleaning Services in San Jose provides residential deep cleaning and recurring maid cleaning services throughout the Bay Area with specific attention to the sources of indoor air quality problems that surface cleaning alone does not reach. From professional carpet steam cleaning and air duct cleaning to detailed bathroom and kitchen sanitization, the approach addresses indoor air quality at the source rather than just the visible symptoms of it.
For Bay Area families dealing with symptoms that may be related to indoor air quality, the combination of professional deep cleaning, duct cleaning, and consistent recurring maintenance creates a measurable improvement in the air quality of the home. Detailed home cleaning services for busy families that include these elements give the home a genuinely healthier baseline that daily habits can maintain between professional visits. The air inside your home should support your health rather than quietly work against it, and understanding the signs that it is not performing that way is the first step toward changing it.
There is something quietly frustrating about a white surface that has turned yellow. It does not happen overnight, so most people do not notice the change as it is happening. One day you look at the white grout between your bathroom tiles, or the white trim around your windows, or the white painted walls in the kitchen, and realize that what was once bright and crisp has taken on a dull, yellowish tone that no amount of regular wiping seems to fix. The finish looks dingy even though you clean regularly. It does not match the fresh white of a new fixture or a recently painted wall nearby, and the difference is suddenly very obvious.
Yellowing on white surfaces is one of the most common complaints homeowners have, and it is also one of the most misunderstood. Most people assume it is simply dirt that has not been cleaned well enough, and they respond by scrubbing harder or using stronger cleaners, which sometimes helps temporarily and sometimes makes things worse. The actual causes of yellowing are more varied than most people realize, and different causes require different solutions. Understanding what is actually making a white surface turn yellow is the only way to address it properly and restore the surface to something close to its original appearance.
The Main Reasons White Surfaces Turn Yellow
The most common cause of yellowing on white painted walls, trim, and ceilings is a chemical process called oxidation. Paint, particularly oil-based paint, contains compounds that react with oxygen in the air over time and gradually change color. This process is slow and steady, and it tends to be most pronounced in rooms with limited airflow and natural light.
Bathrooms without windows, hallways, closets, and rooms with heavy curtains that block sunlight are areas where oxidation yellowing shows up most noticeably. The yellowing happens in the paint itself, not just on the surface, which is why cleaning does not reverse it. The solution is repainting with a higher-quality paint that is more resistant to oxidation, or switching to a latex-based paint which yellows less than oil-based formulas over time.
Nicotine and tobacco smoke are one of the fastest and most dramatic causes of yellowing on every white surface in a home. Cigarette smoke deposits a sticky, oily film on walls, ceilings, trim, tiles, and grout that turns yellow and deepens in color over time. This film coats every surface in the home, not just the rooms where smoking occurs, because it travels through the air and settles everywhere. The yellowing from nicotine is not just a surface issue.
The residue penetrates into porous materials like plaster, grout, and unsealed wood, making it resistant to standard cleaning. Deep cleaning services that specifically target nicotine residue use degreasers and specialized cleaning agents to break down the oily film before the surface can be restored. In severe cases, a stain-blocking primer is needed before repainting over nicotine-stained walls.
Cooking grease and airborne cooking residue is a primary cause of yellowing specifically in kitchens and the areas immediately surrounding them. Every time food is cooked on a stovetop, oil and fat particles become airborne and coat the nearby surfaces. Over time, this thin film of grease oxidizes and turns yellow to brown, coating cabinet faces, walls, ceilings, backsplash grout, and even the surfaces farther from the stove if the ventilation in the kitchen is inadequate.
Range hoods that are not cleaned regularly become saturated with grease and stop filtering effectively, allowing more cooking residue to spread through the kitchen. Professional kitchen cleaning that targets this grease film uses alkaline degreasers that break down oxidized cooking fat in a way that dish soap and general-purpose sprays cannot.
Mineral deposits from hard water create a specific type of yellowing and staining on bathroom surfaces, particularly around faucets, in toilet bowls, on shower tiles and grout, and on white bathroom fixtures like sinks and tubs. The minerals in hard water, primarily calcium and magnesium, leave behind a residue when water evaporates. This residue is initially white or chalky but takes on a yellow to rust-colored tint as iron minerals oxidize within it. In toilet bowls, the combination of mineral deposits and bacterial activity produces a yellow ring that is resistant to standard toilet bowl cleaners and requires an acid-based descaling treatment to remove effectively.
UV light exposure causes a different type of yellowing that affects plastic surfaces more than painted ones. White plastic fixtures, switchplates, outlet covers, blinds, and any other white plastic component in a home exposed to sunlight will yellow over time due to a chemical reaction between UV radiation and the bromine or other fire-retardant compounds used in most white plastics. This process is called photo-oxidation, and once it has occurred in the plastic itself, it cannot be reversed by cleaning. Replacement is usually the only option for severely yellowed plastic surfaces.
Here are the most common white surfaces in a home and the primary causes of their yellowing:
White painted walls and ceilings: oxidation of oil-based paint, nicotine residue, and cooking grease
White grout and tile: hard water mineral deposits, soap scum buildup, and mold growth in bathroom environments
White plastic fixtures and outlet covers: UV-induced photo-oxidation that occurs in the plastic material itself
White bathroom fixtures including sinks, tubs, and toilets: hard water staining, iron deposits, and bacterial buildup
White trim, baseboards, and window frames: oxidation, dust and grime accumulation, and cleaning product residue
White kitchen cabinets: cooking grease oxidation and cleaning product discoloration from repeated wiping with the wrong products
How to Clean and Restore Yellowed White Surfaces
The approach to restoring a yellowed white surface depends entirely on what caused the yellowing in the first place. Using the wrong cleaning method not only fails to fix the problem but can damage the surface or make it harder to address later. Knowing the cause before choosing the solution saves time, money, and the frustration of repeated failed attempts.
For yellowed white grout caused by mineral deposits and soap scum, a paste of baking soda and hydrogen peroxide applied directly to the grout line and left to sit for fifteen to twenty minutes before scrubbing with a stiff grout brush is one of the most effective and safest approaches. The hydrogen peroxide acts as a mild bleaching agent while the baking soda provides gentle abrasion.
For grout that has yellowed from mold growth, a diluted oxygen bleach solution rather than chlorine bleach is safer and effective without releasing harsh fumes in an enclosed bathroom. Professional kitchen and bathroom cleaning that includes grout restoration uses appropriate products for each specific cause of discoloration and produces results that are difficult to achieve with household products alone.
For yellowed painted walls caused by nicotine or cooking grease, the cleaning process begins with a degreaser rather than a general-purpose cleaner. A solution of warm water and a plant-based degreasing cleaner applied with a soft sponge and rinsed cleanly removes the oily residue that causes yellowing on painted walls. Working in sections and rinsing the wall completely after cleaning prevents the residue from redistributing. After cleaning, if the yellowing is still visible, it has likely penetrated into the paint itself and repainting with a stain-blocking primer is the next step. Recurring maid cleaning services that include regular wall wiping in kitchens and bathrooms prevent this type of buildup from reaching the point where it requires repainting.
For white bathroom fixtures with hard water yellowing and iron staining, a pumice stone specifically designed for porcelain surfaces removes the mineral and iron deposits without scratching when used wet and with light pressure. Acid-based toilet bowl cleaners that contain hydrochloric acid dissolve mineral deposits in toilets effectively but require ventilation and should not be mixed with any other cleaning product. For sinks and tubs, a paste of cream of tartar and hydrogen peroxide applied to the stained area and left to dry before rinsing removes mild to moderate mineral staining on white porcelain and enamel surfaces.
Sanitization and disinfecting services done regularly in bathrooms prevent the bacterial component of yellowing from establishing itself in grout and around fixtures. Bacteria that colonize grout lines and the areas around toilet bases and sink drains contribute to discoloration that compounds over time when cleaning is infrequent.
Preventing White Surfaces From Yellowing in the First Place
Prevention is far easier than restoration when it comes to white surface yellowing, and the habits that prevent yellowing are mostly straightforward extensions of good cleaning practice.
Improving ventilation in kitchens and bathrooms reduces the moisture and airborne residue that accelerate yellowing. Running the range hood during every cooking session and cleaning it monthly prevents grease from accumulating on kitchen surfaces. Running the bathroom exhaust fan during and after showers reduces the humidity that promotes mold and mineral deposit buildup on white tile and grout. Wiping down bathroom tile and fixtures after use with a dry cloth significantly reduces the rate at which hard water deposits build up.
Using the right cleaning products on each surface prevents the chemical damage that some cleaning products cause over time. Many homeowners use bleach-based cleaners on everything white, assuming bleach will keep surfaces bright. However, chlorine bleach can actually cause yellowing on certain surfaces, particularly on grout and on some white plastics, when used repeatedly without thorough rinsing. Eco-friendly home cleaning solutions that use hydrogen peroxide, oxygen bleach, or citric acid-based formulas are safer for white surfaces used long-term and less likely to contribute to discoloration.
Heavenly Maids Cleaning Services in Silicon Valley provides residential deep cleaning and recurring maid cleaning services across the Bay Area with the attention to surface-specific cleaning that prevents the gradual yellowing most homeowners notice only after it has already become a visible problem. Professional kitchen and bathroom cleaning that addresses grout, tile, fixtures, and wall surfaces with appropriate methods and products keeps white surfaces cleaner and brighter for longer, reducing the frequency and cost of more intensive restoration work down the line.
White surfaces show everything, which is exactly why people choose them. They make a space feel open, clean, and well-maintained when they are properly cared for. Understanding why they yellow and how to address each specific cause gives homeowners the information they need to keep those surfaces looking the way they were intended to, without the guesswork that leads to the wrong products being used in the wrong places.
Finishing a renovation is one of the best feelings a homeowner can have. Weeks or months of planning, decisions, disruption, and construction finally come to an end, and what you are left with is a space that looks exactly the way you imagined it. New flooring, freshly painted walls, updated fixtures, an expanded kitchen, or a remodeled bathroom. The transformation is real and often dramatic. But somewhere between the last contractor leaving and the moment you actually get to enjoy the finished space, there is a step that most homeowners underestimate: the post-renovation clean.
Construction and renovation work, no matter how carefully managed, leaves behind a level of mess that goes far beyond what regular house cleaning handles. The dust alone from a typical renovation is enough to coat every surface in the home, including surfaces in rooms that were not part of the project. Drywall dust, sawdust, plaster particles, grout residue, paint overspray, adhesive fumes, and construction debris settle into every crack, corner, vent, and fabric surface in the home. Moving back in and living in that environment before it has been properly cleaned is not just uncomfortable. It is a genuine health concern, particularly for children, older adults, and anyone with respiratory sensitivities.
Why Post-Renovation Cleaning Is Different From Regular Cleaning
The dust produced by renovation work is not the same as everyday household dust. Drywall dust, for example, is composed of very fine calcium sulfate particles that become airborne easily and stay suspended in the air for extended periods before settling. When they do settle, they coat surfaces in a thin white film that smears rather than wiping away cleanly with a standard cloth. Sawdust from cutting wood during framing, flooring installation, or cabinetry work is slightly coarser but equally pervasive, working its way into carpet fibers, upholstered furniture, and HVAC vents where it sits and gets recirculated through the air system.
Paint fumes and residue from primers, sealers, and finishes linger on surfaces and in the air long after the work is done. Grout dust and tile-cutting residue coat floor surfaces and get tracked through the home on workers’ shoes. Adhesives used for flooring, tile, and cabinetry release VOCs that affect indoor air quality for days after application. The cumulative effect of all these materials in a home that has just been renovated is an indoor environment that looks better than it ever has and breathes worse than it has in years.
Standard house cleaning tools and methods are not designed for this level of contamination. A regular mop spreads fine dust into a paste rather than removing it. A standard vacuum without the right filtration can redistribute fine particles into the air. Consumer-grade cleaning products do not have the cutting power needed for dried grout haze, construction adhesive residue, or the thick layer of dust that coats every horizontal surface after a project. This is why post-renovation cleaning is a specialized service that requires professional equipment, the right sequence of steps, and an understanding of what construction residue actually is and how it needs to be removed.
The Right Order of Operations for Post-Renovation Cleaning
One of the most important aspects of effective post-renovation cleaning is doing things in the right order. Starting in the wrong place wastes time and effort and often means re-cleaning areas that get contaminated again by tasks done afterward. The correct sequence begins at the top of the space and works systematically downward, finishing with the floors last because everything displaced from above will settle there.
Ceiling fans, light fixtures, and the tops of cabinets and door frames should be addressed first. These are the highest points in the room and the ones that collect the heaviest layer of construction dust. Cleaning them first prevents the debris from falling onto surfaces that have already been cleaned lower in the room. Window cleaning comes next, covering both the glass and the window frames, sills, and tracks where construction dust and debris settle in significant quantities.
Interior window cleaning after a renovation removes the grime that makes a newly renovated space look less finished than it actually is. Post-renovation window washing also reveals whether any paint overspray or adhesive has landed on the glass, which requires specific treatment to remove without scratching.
Wall surfaces come after windows. Freshly painted walls may look clean but often have dust on the surface from the renovation work done nearby. Wiping walls with a damp microfiber cloth removes this surface layer without disturbing the new paint. Baseboards and trim should be cleaned at this stage as well, since they collect significant construction debris and often have plaster, caulk, or paint drips that were missed during finishing.
Kitchen and bathroom surfaces need detailed attention after a renovation even if those rooms were not the focus of the project. Dust travels through the entire home during construction, and kitchen counters, cabinet interiors, and bathroom fixtures will have a layer of fine particulate that needs to be removed before the space is used for food preparation or personal care. If the kitchen or bathroom was the renovation focus, the cleaning scope expands to include grout haze removal from new tile, residue from new fixture installation, and construction adhesive from flooring work.
Carpet cleaning is one of the final steps and one of the most important ones in a post-renovation clean. Carpets that were present during a renovation absorb construction dust, fine particles, and debris at a level that vacuuming alone cannot address. Professional carpet cleaning using hot water extraction pulls the embedded renovation debris out of the full depth of the carpet fibers, including the padding beneath, and removes the fine dust that a vacuum leaves behind. For new carpet installed as part of the renovation, a professional clean removes the installation residue and any debris from the surrounding work that settled into the new fibers during or after installation.
Here are the key steps in the correct sequence for a thorough post-renovation clean:
Clear all visible debris and construction waste before any cleaning begins
Clean ceiling fixtures, fan blades, and tops of high surfaces first
Wipe all walls and ceilings with a damp microfiber cloth to remove surface dust
Clean all windows including frames, sills, and tracks inside and out
Wipe all cabinet faces, doors, and hardware with appropriate cleaners for each surface
Deep clean kitchen and bathroom surfaces including inside cabinets and drawers
Remove grout haze from new tile using the appropriate pH-neutral cleaner
Vacuum all carpets and upholstered furniture with a HEPA filter vacuum
Mop all hard floors in the correct sequence for the floor type
Schedule professional carpet steam cleaning as the final interior step
Air Quality and Exterior Cleaning After a Renovation
The air inside a home after a renovation is one of the most overlooked aspects of post-construction cleaning. Renovation work saturates the air with fine particles, VOCs from paints and adhesives, and fumes from sealers and finishes. Even after visible dust has been removed from surfaces, the air ducts have been pulling all of these particles through the system for the duration of the project. Fine construction dust, drywall particles, and debris settle inside the ductwork and continue to be pushed through the home every time the HVAC system runs.
Duct cleaning after a renovation removes this accumulated material from inside the system and produces an immediate improvement in indoor air quality that surface cleaning alone cannot deliver. For anyone moving back into a renovated home, having the air ducts professionally cleaned before resuming normal occupancy protects the health of everyone in the household from the first day they return. Dryer vent cleaning is worth including at the same time, since renovation debris often finds its way into laundry areas and the vent connection at the back of the dryer.
The exterior of the home also needs attention after a renovation. Construction crews track material in and out of the property repeatedly during a project, and driveways, walkways, patios, and the area immediately surrounding the home often have concrete residue, paint drips, adhesive, or general construction debris ground into the surface. Pressure washing the exterior removes this material from hard surfaces and restores the appearance of the property to match the quality of the renovation work done inside.
Advanced pressure washing and exterior care handles concrete residue and embedded construction grime that a garden hose cannot remove. For renovations that included roof work or work near the gutters, checking and cleaning the gutters after the project removes roofing debris and material that would otherwise cause drainage problems.
Heavenly Maids Cleaning Services in San Jose provides post-renovation cleaning for homes and commercial spaces across the Bay Area with the equipment, products, and process knowledge that this specialized service requires. From premium residential deep cleaning after a full home remodel to targeted after-renovation cleaning for a single room project, the work is done in the right order, with the right tools, and at a level of detail that gets the space genuinely ready to live in rather than just visually presentable.
After a renovation, the home deserves the same level of care and attention that went into the project itself. Cutting corners on post-renovation cleaning means living with construction residue in the air, in the carpets, and in the ducts for months without realizing it. A thorough, professional post-renovation clean closes out the project properly and lets the finished space be experienced the way it was designed to be, clean, fresh, and genuinely ready for the next chapter.